Have you ever wondered how a simple dish can transform into a restaurant-quality meal in just 30 minutes? This is where the magic of a delightful Italian-American dish comes into play. Imagine tender, pan-fried cutlets drenched in a bright, tangy sauce that awakens your taste buds.
This easy chicken dish, made without any wine or alcohol, relies on rich chicken broth for depth of flavor. It’s perfect for those busy weeknights when you want something quick yet impressive. With minimal prep and just a handful of pantry staples, you can create a meal that feels indulgent without the fuss.
Whether you prefer a classic version or a creamy twist, this dish promises to deliver on taste and satisfaction. Get ready to elevate your dinner game with this simple chicken piccata that’s sure to become a favorite!
Key Takeaways
- Transform basic chicken into a gourmet meal in under 30 minutes.
- Enjoy a bright, tangy sauce without any wine or alcohol.
- Choose between a classic or creamy version for variety.
- Perfect for busy weeknights with minimal prep time.
- Learn how to achieve juicy chicken with a crisp exterior.
Understanding Chicken Piccata: What Makes It Special?
Delve into the essence of chicken piccata and discover what sets it apart. This dish is not just a meal; it carries a rich history and delightful flavors that make it a staple in many homes.
Originating from Italian-American kitchens, chicken piccata is a modern twist on classic Italian cooking techniques. The term “piccata” refers to the method of preparing thin slices of meat, typically dredged in flour and pan-fried. This technique, known as scaloppine, was brought to the United States by Italian immigrants.
Interestingly, the dish likely developed in Italian-American restaurants rather than in Italy itself. This evolution makes it a cherished part of American culinary heritage. You can appreciate how the combination of fresh ingredients creates a unique flavor profile that is both tangy and savory.
The Origins of Chicken Piccata
As you explore the origins, you’ll find that chicken piccata embodies the spirit of Italian-American cuisine. It showcases how traditional recipes can adapt and flourish in new environments.
Key Flavors: Lemon, Capers, and Butter
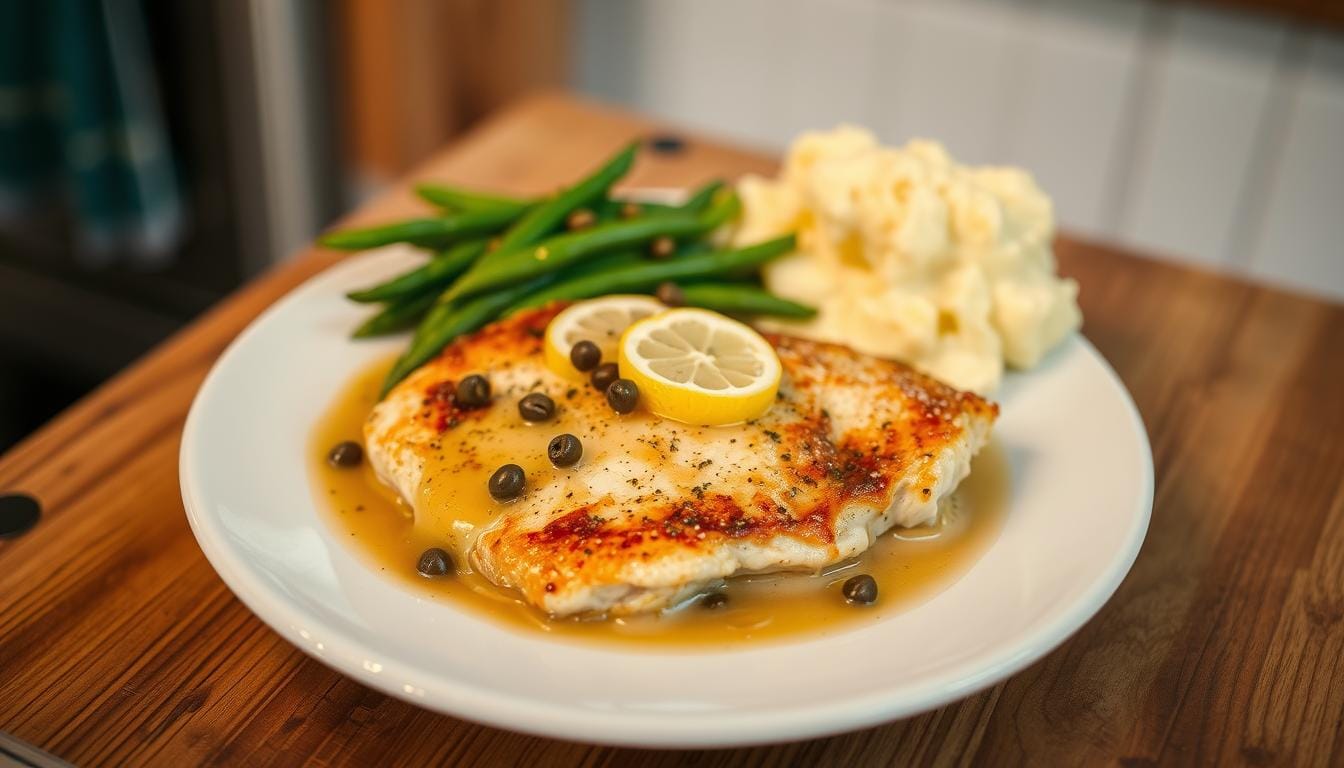
The three key flavors that define this dish are bright lemon juice, briny capers, and rich butter. Together, they create an irresistible balance that elevates the taste of the chicken.
This combination of simple ingredients results in a remarkably complex flavor profile. You will find that the sauce complements the chicken beautifully, enhancing each bite.
Why This Recipe Works for Weeknights
This chicken piccata recipe is perfect for busy weeknights. The thin cutlets cook quickly, taking just 4-5 minutes per side. This means you can have dinner on the table in under 30 minutes!
Unlike traditional versions that often use white wine, this alcohol-free approach utilizes chicken broth to build depth of flavor. This makes it accessible for families who prefer to avoid alcohol in their cooking.
Moreover, the quick pan sauce comes together effortlessly in the same skillet while the chicken rests. This minimizes cleanup and maximizes flavor, making it a practical choice for any night of the week.
With its elegant presentation and simple preparation, chicken piccata can easily become a regular feature in your dinner rotation.
Essential Ingredients for a Delicious Chicken Piccata (No Wine or Alcohol!)
Every memorable meal begins with choosing quality ingredients. For this delightful dish, you will need a selection of fresh items that come together to create a rich and flavorful experience.
Chicken Breasts: Choosing and Preparing the Perfect Cutlets
Start with two large boneless, skinless chicken breasts, approximately 2 lbs in total. When selecting your chicken, look for fresh, plump breasts with minimal fat. Avoid those with added solutions or brines for the best flavor.
To prepare, butterfly and slice the breasts into thin, even cutlets. This technique ensures they cook quickly and evenly, making your cooking process efficient.
Using Chicken Broth Instead of Wine: An Alcohol-Free Alternative
Instead of using dry white wine, this recipe calls for chicken broth to create a flavorful, alcohol-free sauce. A low-sodium option is recommended, allowing you to control the salt level effectively. This is especially important since both capers and butter add their own saltiness to the dish.
Fresh vs. Pantry Staples: Lemons, Capers, Butter, and More
Bright lemon juice and zest are essential for that refreshing citrus punch. You will need both the juice and zest from one whole lemon to maximize flavor. Additionally, brined capers add a tangy, salty pop to the sauce; just be sure to drain them well before use.
Butter plays a dual role in this dish. Half is used for pan-frying the cutlets, while the other half enriches the finished sauce. Combining olive oil with butter during frying helps prevent burning while imparting a rich flavor.
Optional Garnishes to Elevate Your Dish
To finish your dish beautifully, consider adding optional garnishes. Freshly chopped parsley and grated Parmesan cheese not only enhance the visual appeal but also add an extra layer of flavor.
If you prefer a creamy version, stir in heavy whipping cream at the end for a luxurious texture without any alcohol.
| Ingredient | Quantity | Notes |
|---|---|---|
| Boneless, skinless chicken breasts | 2 large (about 2 lbs) | Fresh, plump, minimal fat |
| Salt and pepper | To taste | For seasoning |
| Garlic powder | 1/4 teaspoon | Adds flavor |
| Flour | For dredging | Creates a golden crust |
| Butter | 4 tablespoons (divided) | Half for frying, half for sauce |
| Olive oil | 1 tablespoon | Prevents butter from burning |
| Chicken broth | 1/4 cup (up to 3/4 cup if omitting cream) | Alcohol-free alternative |
| Lemon juice | 1 tablespoon | Freshly squeezed |
| Lemon zest | Zest of 1 lemon | For maximum flavor |
| Brined capers | 1 tablespoon | Drained before use |
| Heavy whipping cream (optional) | 1/2 cup | For a creamy sauce |
Kitchen Tools and Equipment You’ll Need
To create a delicious meal, having the right tools in your kitchen is essential. This section outlines the must-have equipment for making your dish successful and enjoyable. From skillets to gadgets, each tool plays a vital role in the cooking process.
The Ideal Skillet and Why It Matters
A large cast iron skillet is ideal for this dish. It retains heat evenly, allowing your chicken cutlets to develop a beautiful sear. A 12-inch skillet gives you enough surface area to cook two cutlets at a time without overcrowding. This is crucial for achieving proper browning.
Helpful Gadgets: Meat Mallet, Thermometer, and Microplane Zester
Having the right gadgets can make your cooking experience smoother. A meat mallet is incredibly useful for pounding chicken breasts to a uniform thickness, ensuring even cooking. An instant-read thermometer takes the guesswork out of knowing when your chicken has reached the safe internal temperature of 165°F.
A Microplane zester is highly recommended for zesting the lemon. It allows you to easily remove the fragrant yellow zest without getting any bitter white pith. This adds intense lemon flavor to your sauce.
Why a Splatter Guard Makes Cleanup Easier
When pan-frying, a splatter guard is a game changer. It dramatically reduces oil splatters on your stovetop and counters, making cleanup hassle-free. Additionally, a pair of sturdy tongs helps you flip the delicate cutlets and transfer them to a plate without breaking the crispy coating.
Before you start cooking, ensure all your tools are ready. This preparation makes the process smooth and enjoyable, especially since this dish moves quickly once the pan is hot.
| Tool | Purpose | Notes |
|---|---|---|
| Large skillet | Cooking chicken cutlets | Cast iron preferred for even heat |
| Meat mallet | Pounding chicken to uniform thickness | Ensures even cooking |
| Instant-read thermometer | Checking chicken doneness | Safe internal temperature is 165°F |
| Microplane zester | Zesting lemons | Avoids bitter pith |
| Splatter guard | Reducing oil splatters | Makes cleanup easier |
| Sturdy tongs | Flipping cutlets | Helps transfer without breaking |
| Shallow bowl or pie pan | Holding flour for dredging | Makes coating quick and mess-free |
| Sharp chef’s knife | Butterflying and slicing chicken | Ensures clean cuts |
Preparing Your Chicken: Steps Before Cooking
Before you dive into cooking, mastering the preparation of your ingredients is crucial. Properly preparing your chicken ensures even cooking and enhances the flavors in your dish. Here’s how to get started with your chicken breasts.
Butterflying and Slicing Chicken Breasts Thinly
Begin by placing each boneless, skinless chicken breast on a cutting board. Carefully butterfly it horizontally with a sharp knife to create two thinner halves. Once butterflied, cut each half completely through to yield four thin, even cutlets.
If any cutlets are still thicker than about half an inch, use a meat mallet to gently pound them to an even thickness between two sheets of plastic wrap. Trimming away any visible fat or tendons from the chicken breasts results in a cleaner presentation and better texture in the finished dish.
Seasoning and Dredging: How to Get the Perfect Coating
Season both sides of each cutlet generously with salt and freshly ground black pepper. This step is essential for building flavor from the very first bite. A light sprinkle of garlic powder over the seasoned chicken adds a subtle aromatic quality that complements the lemon and caper sauce beautifully.
Next, spread all-purpose flour on a shallow plate or pie pan. Dredge each seasoned cutlet, pressing gently to ensure an even, light coating on all sides. Shaking off excess flour is important; too thick a coating can become gummy rather than crispy when pan-fried in the oil and butter mixture.
The flour coating serves two purposes: it creates a golden, crispy exterior and helps thicken the piccata sauce slightly later in the cooking process. Set the dredged chicken cutlets aside on a clean plate while you heat the skillet. This allows the flour to adhere properly before they hit the hot pan.
Cooking the Chicken Piccata: Step-by-Step Instructions
Cooking this dish is an art that combines timing and technique to achieve perfection. Follow these steps carefully to ensure your meal turns out golden and juicy.
Pan-Frying Techniques for Golden, Juicy Chicken
Start by heating a large skillet over medium-high heat. Add 2 tablespoons of butter and 1 tablespoon of olive oil to the pan. Wait until the butter melts and the mixture becomes shimmering hot.
The combination of butter and oil is essential. The oil raises the smoke point of the butter, preventing it from burning while still providing that rich flavor.
Carefully place two dredged chicken cutlets into the hot skillet. Be sure not to overcrowd the pan, as this will cause the chicken to steam rather than fry.
Cook the chicken for approximately 4 to 5 minutes on the first side. This allows a deep golden-brown crust to develop. Afterward, flip each cutlet with tongs and cook the second side for another 4 to 5 minutes.
Tips to Avoid Overcooking Thin Cutlets
Thin cutlets cook very quickly, so you must be attentive. Overcooking even by a minute or two can result in dry, tough chicken. Use an instant-read thermometer to check that the thickest part of each cutlet has reached 165°F, the safe internal temperature for poultry.
Once cooked, transfer the chicken to a clean plate and tent it loosely with foil to keep it warm while you prepare the sauce in the same skillet.
Safety Tips: Using an Instant-Read Thermometer
Using an instant-read thermometer is crucial for ensuring your chicken is cooked safely. This tool takes the guesswork out of cooking and guarantees that your meal is both delicious and safe to eat.
If cooking in batches, you may need to add a little more butter and olive oil to the pan between batches to maintain the proper frying environment. The browned bits left in the bottom of the skillet after frying are packed with flavor and will form the foundation of your piccata sauce.
Making the Lemony, Buttery Piccata Sauce Without Wine
Creating a delicious sauce is where the magic truly happens in this dish. This version of the sauce relies entirely on chicken broth, lemon juice, butter, and capers. The result is a tangy, rich flavor profile that will elevate your meal without the need for any alcohol.
Start by removing the skillet from the heat. This step is crucial as it prevents splattering and allows you to control the sauce-building process effectively. Pour in the chicken broth and lemon juice, scraping the bottom of the pan with a whisk or wooden spoon. This action releases all those flavorful browned bits left from frying the chicken.
Building Flavors with Chicken Broth, Lemon Juice, Butter, and Capers
Unlike traditional recipes that often call for dry white wine, this alcohol-free sauce gets its depth from the chicken broth. The addition of fresh lemon zest along with the juice infuses the sauce with intense citrus oils and aroma, which bottled juice simply cannot replicate.
Next, whisk in the remaining butter off the heat. This creates a glossy, emulsified texture that beautifully coats the chicken. At this stage, stir in the brined capers, allowing their tangy, salty brine to enhance the sauce. This addition gives delightful bursts of flavor in every bite.
Optional Cream Addition for a Richer Sauce
If you prefer a creamy sauce, now is the time to stir in some heavy whipping cream. This transforms the sauce into a rich, velvety consistency that pairs wonderfully with the tangy notes. For those opting for a non-creamy version, simply increase the chicken broth to three-quarters of a cup, allowing the sauce to reduce and concentrate its flavors naturally.
How to Adjust Sauce Consistency and Flavor
Return the skillet to medium heat and let the sauce come to a gentle bubble. Nestle the chicken cutlets back into the pan to finish cooking. As the sauce simmers for about 5 minutes, it will reduce and thicken. If the sauce becomes too thick, adjust the consistency by adding more broth.
Tasting the sauce before serving is essential. If the lemon flavor is too sharp, you can mellow it with a splash of additional broth or a small pat of butter. A final sprinkle of fresh chopped parsley adds a pop of color and a fresh, herbaceous note that balances the richness of the butter.

Serving Suggestions to Complete Your Chicken Piccata Meal
Enhancing your meal with thoughtful pairings can elevate the dining experience. This dish shines with the right accompaniments, making your dinner memorable.
Pairing With Pasta: Best Pasta Types for This Dish
Angel hair pasta is an excellent choice to complement the light but powerful sauce. Its delicate strands soak up the tangy lemon-butter sauce without overwhelming the dish.
Spaghetti and linguine are also fantastic options, providing a slightly heartier texture that still pairs well with the bright flavors of the sauce. Remember to cook your pasta until al dente right before serving, as angel hair cooks in just a few minutes and can quickly become mushy if left unattended.
Side Dishes That Complement the Tangy Sauce
When it comes to side dishes, you have plenty of delightful options. Excellent choices include:
- Steamed green beans, which add a crisp texture.
- Roasted asparagus, offering a savory contrast.
- A simple arugula salad dressed with olive oil and lemon for a refreshing touch.
- Crusty bread, perfect for soaking up every last drop of the delicious sauce.
Garnishing Tips for Visual and Flavor Appeal
For garnish, a generous sprinkle of freshly chopped parsley adds a bright, herbaceous finish. This not only enhances the visual appeal but also complements the dish’s flavors beautifully.
Freshly grated Parmesan cheese is an optional but highly recommended addition. It adds a savory, nutty dimension to the finished dish, making it even more indulgent.
This complete meal comes together in about 30 minutes, making it an impressive yet effortless option for both casual family dinners and entertaining guests.
Storing and Reheating Your Chicken Piccata
Understanding how to store and reheat your dish can enhance your dining experience. Proper storage ensures that your meal remains fresh and delicious for days to come. Here’s what you need to know about keeping your chicken piccata at its best.
How Long It Lasts in the Refrigerator
This flavorful dish will stay good for up to three days in an airtight container in the refrigerator. Storing it properly is essential to maintain its taste and texture.
Best Practices for Reheating Chicken, Sauce, and Pasta Separately
For the best results, store the chicken cutlets, the piccata sauce, and any pasta in separate airtight containers. This prevents the chicken’s crispy coating from becoming soggy and keeps the pasta from absorbing too much sauce.
- You can store leftover chicken piccata in the refrigerator for up to three days, making it a great option for meal prep or enjoying the next day.
- When you are ready to reheat, the chicken cutlets can be warmed gently in the microwave, but for better texture, use a skillet over low heat or a 350°F oven.
- Reheating the chicken in a skillet allows the exterior to re-crisp slightly while the inside warms through without drying out.
- You will reheat the sauce separately in a small saucepan over low heat, stirring occasionally, until it is warmed through and returns to a smooth, glossy consistency.
- If the sauce has thickened too much during storage, you can thin it with a splash of chicken broth while reheating to restore its original texture.
- Pasta reheats beautifully in the microwave with a tiny splash of water or broth to revive it, or you can briefly dip it in boiling water to warm it through.
- Once all components are reheated, plate them fresh and spoon the warm sauce over the chicken and pasta just as you did when the dish was first made.
- Avoid freezing this dish if possible, as the cream-based sauce can separate upon thawing and the texture of the chicken may become compromised.

Common Mistakes to Avoid When Making Chicken Piccata
When crafting a delicious meal, avoiding common pitfalls can make all the difference. This dish, while simple, can easily go awry if you’re not careful. Here are some key mistakes to watch out for as you prepare your flavorful creation.
Overcooking Chicken Cutlets
One of the most common mistakes you can make is overcooking the thin cutlets. They need only 4 to 5 minutes per side in a hot skillet. Using an instant-read thermometer is essential to ensure they reach 165°F. This guarantees the chicken is cooked through without losing its juiciness.
Using Too Much Lemon or Salt
While lemon adds a refreshing zing, using too much can overwhelm the dish with acidity. Start with the recommended amount and taste the sauce before adding more. Similarly, be cautious with salt. Brined capers and butter both contribute saltiness, so using low-sodium chicken broth can help you maintain better control over the flavor.
Skipping the Sauce Reduction Step
Never skip the crucial step of reducing the sauce after adding the chicken broth and lemon juice. This step concentrates the flavors and thickens the sauce to the right consistency. Rushing this process can lead to a thin, watery sauce that won’t cling properly to the chicken and pasta.
Another common error is overcrowding the skillet when frying the chicken. This drops the pan temperature and causes the cutlets to steam instead of developing a golden crust. To avoid burning the butter, combine it with olive oil and monitor the heat throughout the cooking process.
Lastly, don’t forget to scrape up the browned bits from the bottom of the skillet when adding the broth. These bits are packed with flavor and essential for a rich sauce. Tasting and adjusting the final sauce is also important; a small adjustment of broth, butter, or lemon can transform a good dish into a great one.
| Mistake | Impact | Solution |
|---|---|---|
| Overcooking chicken cutlets | Dry, tough meat | Use an instant-read thermometer |
| Using too much lemon | Overly acidic flavor | Start with less, taste, and adjust |
| Skipping sauce reduction | Thin, watery sauce | Allow sauce to simmer and thicken |
| Overcrowding the skillet | Steamed, not fried chicken | Cook in batches |
| Not scraping the skillet | Loss of flavor | Incorporate browned bits into sauce |
| Failing to taste sauce | Unbalanced flavor | Adjust seasoning as needed |
Conclusion
In just 30 minutes, you can create a dish that feels like a gourmet experience right at home. This easy chicken piccata recipe is perfect for busy weeknights, showcasing a flavorful lemon butter caper sauce that your family will love. You don’t need white wine to achieve a rich, tangy flavor; this alcohol-free version proves that simplicity can be delicious.
The combination of golden pan-fried cutlets, bright lemon, briny capers, and rich butter creates a dish that feels special yet is simple enough for any night. With the techniques you’ve learned, you can avoid common pitfalls and impress everyone at your table.
Next time you need a quick, impressive dinner, turn to this recipe with confidence. It’s destined to become a staple in your dinner rotation, transforming humble chicken breasts into an elegant, flavorful dish that never disappoints.